ge clothes dryer manual
GE Clothes Dryer Manual⁚ A Comprehensive Guide
This comprehensive guide provides you with all the information you need to understand and operate your GE clothes dryer. It covers everything from safety precautions and installation to drying cycles, maintenance, and troubleshooting common problems. Whether you’re a seasoned user or a new owner, this manual will help you get the most out of your GE dryer.
Introduction
Welcome to the GE family! We’re proud of our quality products and we believe in dependable service. You’ll see it in this easy-to-use manual and you’ll hear it in the friendly voices of our customer service department. Best of all, you’ll experience these values each time you do the laundry. That’s important, because your new dryer will be part of your family for a long time.
Experience the convenience and performance of GE dryers and make your laundry routine easier than ever before. For comprehensive information on how to operate and maintain your GE dryer, refer to the user manual provided with your appliance.
This manual is a valuable resource that will help you understand the features, operation, and care of your GE dryer. It contains detailed information about installation, drying cycles, troubleshooting, and more. By taking the time to read this manual, you’ll be able to get the most out of your dryer and ensure it runs smoothly for years to come.
We encourage you to keep this manual handy for quick reference and to refer to it regularly for tips and advice. If you have any questions or concerns, don’t hesitate to contact GE Customer Support. We’re here to help you enjoy your new dryer to the fullest.
Safety Precautions
Your safety and the safety of others is our top priority. Please read and understand the following safety precautions before using your GE dryer.
General Safety
- Never operate the dryer if it is damaged or malfunctioning.
- Do not overload the dryer. Overloading can cause overheating and fire hazards.
- Do not dry items that have been cleaned with flammable liquids. The fumes can ignite and cause a fire.
- Keep the dryer area clear of flammable materials.
- Do not use the dryer as a storage space.
- Do not use the dryer to dry items that are not specifically designed for machine drying.
- Keep children away from the dryer.
- Do not tamper with the dryer’s controls or wiring.

Electrical Safety
- Make sure the dryer is properly grounded.
- Do not use a damaged or frayed power cord.
- Unplug the dryer before cleaning or performing any maintenance.
- Do not operate the dryer with wet hands.
Fire Safety
- Clean the lint filter after each use.
- Have the dryer vent inspected and cleaned regularly by a qualified technician.
- Do not block the dryer vent.
- Do not use the dryer in a closed or unventilated area.
By following these safety precautions, you can help ensure the safe and efficient operation of your GE dryer.
Installation and Setup
Proper installation is crucial for the safe and efficient operation of your GE dryer. Please follow these steps carefully, referring to the detailed instructions provided in your specific GE dryer manual.
Location and Preparation
- Choose a level, well-ventilated area for your dryer, away from direct sunlight and heat sources.
- Ensure that the floor can support the weight of the dryer.
- Make sure there is sufficient space around the dryer for proper ventilation and access.
Venting
- GE dryers require proper venting to exhaust hot air and lint. Use rigid, UL-listed venting materials.
- Install the vent as straight as possible, avoiding sharp bends or kinks.
- Ensure the vent is properly secured to the wall or ceiling.
- The vent should terminate at least 3 feet above ground level and at least 12 inches away from any windows, doors, or other openings.
Electrical Connection
- Your GE dryer requires a dedicated 240-volt electrical outlet with a properly grounded three-prong plug.
- Never attempt to modify the electrical connection or use an adapter.
- Consult a qualified electrician if you have any doubts about the electrical installation.
Leveling and Securing
- Level the dryer using the adjustable feet.
- Secure the dryer to the wall or floor using the provided brackets or straps.
Final Checks
- Once the dryer is installed, run a test cycle to ensure it is operating correctly.
- Check for any leaks or other issues.
- Read the user manual carefully for specific instructions and safety information related to your GE dryer model.
By following these installation guidelines, you can ensure that your GE dryer is set up safely and correctly, ready for efficient and reliable performance.
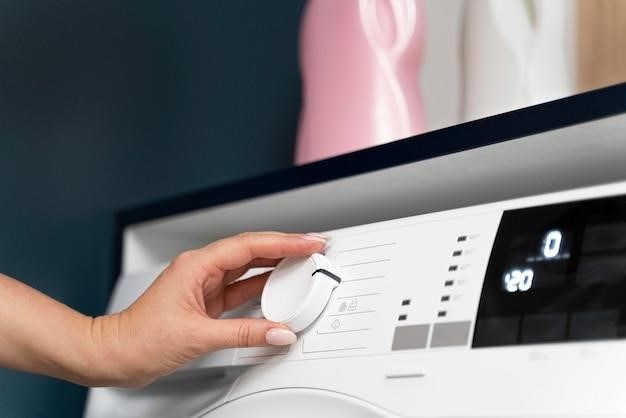
Understanding the Controls
Your GE dryer comes equipped with a user-friendly control panel designed for easy operation. Familiarize yourself with these controls to make the most of your dryer’s features.
Cycle Selector Knob
- This knob allows you to choose from various drying cycles tailored to different fabric types and loads.
- Common cycles include⁚ Normal, Delicate, Timed Dry, and Steam Dry.
- Refer to your manual for a detailed description of each cycle and its appropriate settings.
Temperature Control
- Adjust the temperature setting based on the fabric type and your desired level of dryness.
- Options typically include High, Medium, and Low heat settings.
- Always choose the appropriate temperature setting to avoid damaging your clothes.
Timed Dry Option
- If you prefer to set a specific drying time, use the Timed Dry option.
- Select the desired drying duration, ranging from 10 minutes to an hour or more, depending on your model.
Optional Features
- Some GE dryers offer additional features such as Wrinkle Guard, Sanitize, or Steam cycles.
- These features can enhance your drying experience, providing additional protection and care for your clothes.
- Review your manual to understand the function and usage of these optional features.
Start/Pause Button
- Initiate the drying cycle by pressing the Start/Pause button.
- The dryer will begin operating according to your selected settings.
- Pressing the button again will pause the cycle.
By understanding the control panel and its various functions, you can easily operate your GE dryer and enjoy the benefits of its advanced features.
Drying Cycles and Settings
Your GE dryer offers a variety of drying cycles designed to cater to different fabric types and laundry needs. Each cycle employs specific heat settings, tumbling speeds, and durations to achieve optimal drying results while protecting your clothes.
Normal Cycle
- This is the standard drying cycle for everyday laundry, suitable for most cotton and synthetic fabrics.
- It uses a combination of high heat and a longer drying time to thoroughly dry your clothes.
Delicate Cycle
- Designed for delicate fabrics like silk, lace, and wool, this cycle uses a lower heat setting and a gentler tumbling action to prevent shrinkage or damage.
- It’s ideal for garments requiring extra care.
Timed Dry Cycle
- If you prefer to set a specific drying time, use the Timed Dry cycle.
- You can select the desired drying duration, ranging from 10 minutes to an hour or more, depending on your model.
- This cycle is useful for quick drying or for items that require less drying time.
Steam Dry Cycle
- Some GE dryers feature a Steam Dry cycle, which uses steam to help loosen wrinkles and refresh your clothes.
- This cycle is effective for removing wrinkles and odors from garments without the need for ironing.
Optional Settings
- Your dryer might offer additional settings like Wrinkle Guard, Sanitize, or Auto Dry.
- These features can enhance your drying experience by providing additional protection and care for your clothes.
- Refer to your manual for detailed information on these settings and their usage.
By understanding the different drying cycles and their associated settings, you can choose the optimal option for each load of laundry, ensuring your clothes are dried efficiently and safely.
Maintenance and Cleaning
Regular maintenance and cleaning are crucial for your GE dryer’s optimal performance, efficiency, and longevity. By following these simple steps, you can ensure your dryer operates smoothly and safely for years to come.
Lint Filter Cleaning
- The lint filter, located inside the dryer door or on the top of the drum, traps lint and debris during each drying cycle.
- Clean the lint filter after every drying cycle to prevent lint buildup, which can restrict airflow, extend drying times, and pose a fire hazard.
- Simply pull out the lint filter, remove any lint or debris, and reinsert it.
Dryer Vent Cleaning
- The dryer vent, which connects the dryer to the exterior vent, can accumulate lint over time.
- Cleaning the dryer vent is essential to maintain optimal airflow and prevent dryer fires.
- Clean the vent at least once a year, or more frequently if you notice a buildup of lint.
- Disconnect the dryer from the power source and unplug it before cleaning the vent.
- Use a vent cleaning brush or a vacuum cleaner with a hose attachment to remove lint from the vent.
Dryer Drum Cleaning
- The dryer drum can accumulate residue from laundry detergent, fabric softener, and dirt over time.
- To clean the drum, wipe it down with a damp cloth and a mild detergent.
- Avoid using harsh chemicals or abrasive cleaners, as they can damage the drum’s finish.
Dryer Exterior Cleaning
- Wipe down the dryer’s exterior with a damp cloth and a mild detergent to remove dust, dirt, and fingerprints.
- Avoid using harsh chemicals or abrasive cleaners.
By performing these regular maintenance tasks, you can keep your GE dryer running smoothly and efficiently, ensuring safe and effective drying for your clothes.
Troubleshooting Common Problems
While GE dryers are known for their reliability, occasional problems can arise. Here’s a guide to troubleshooting some common issues⁚
Dryer Not Starting
- Check if the dryer is plugged in and the power cord is properly connected.
- Ensure the circuit breaker hasn’t tripped or the fuse hasn’t blown.
- Verify that the dryer door is securely closed, as the door switch prevents operation with the door open.
- If the dryer is equipped with a timer, ensure it is set correctly.
Dryer Not Drying Clothes Properly
- Clean the lint filter thoroughly, as a clogged filter restricts airflow and reduces drying efficiency.
- Inspect the dryer vent for any blockages, as a clogged vent can hinder airflow and cause drying problems.
- Ensure the dryer is using the appropriate drying cycle for the type of clothes you are drying.
- Check if the dryer’s temperature setting is too low or too high for the type of clothes.
Dryer Making Unusual Noises
- A rattling noise could indicate a loose item in the dryer drum, such as a coin or a button.
- A grinding noise may indicate a problem with the dryer drum or bearings.
- A humming noise could signify a problem with the dryer motor or blower fan.
Dryer Leaking Water
- If the dryer is leaking water, check the water inlet valve for leaks.
- Ensure the dryer’s drain hose is properly connected and not kinked, as this can cause water to back up.
- If the dryer has a steam function, check for leaks in the steam generator or hoses.
If these troubleshooting steps don’t resolve the issue, contact GE customer support for further assistance.