
how to use a gait belt pdf
How to Safely Use a Gait Belt: A Comprehensive Guide
This comprehensive guide offers essential instructions for caregivers and individuals on the proper and safe application and utilization of a gait belt. Mastering these techniques ensures secure transfers and mobility assistance, enhancing patient safety and caregiver confidence throughout the process. Follow these detailed steps diligently.
Understanding Gait Belts
A gait belt, often referred to as a transfer belt, is a crucial safety device used primarily in healthcare settings to assist individuals with limited mobility. It’s designed to provide caregivers with a secure and firm grip point, allowing them to support a patient during transfers, ambulation, and repositioning without directly grasping their clothing or body, which can be uncomfortable or unsafe. Typically made from durable, heavy-duty fabric like cotton or nylon webbing, gait belts vary in length, width, and even padding to accommodate diverse patient sizes and caregiver preferences. They feature a robust buckle, commonly a quick-release plastic clip or a strong metal tongue-and-buckle mechanism, ensuring it can be fastened securely around a patient’s waist. Understanding its fundamental design and function, including the various types of materials and fasteners available, is the first step towards its effective and safe application. It acts as an extension of the caregiver’s hands, offering enhanced control and stability, significantly reducing the risk of falls for both the patient and the assistant. Grasping the basic utility, construction, and inherent safety features of this indispensable device is essential before any practical application or maneuver.

Purpose and Benefits of a Gait Belt
The primary purpose of a gait belt is to enhance safety during patient transfers and ambulation. It provides a secure handhold for caregivers, allowing them to offer support and stability without pulling on a patient’s arms, clothing, or skin, which can cause injury or discomfort. This direct point of contact significantly and effectively reduces the risk of falls for individuals with compromised balance, weakness, or mobility challenges. By offering a stable grip, caregivers can better control a patient’s movements, guide them safely, and prevent sudden shifts in balance. This also protects the caregiver from potential back strain or other musculoskeletal injuries that can occur when lifting or supporting patients incorrectly.
The benefits extend beyond immediate safety. A gait belt fosters greater patient independence by enabling them to participate more actively in their own mobility, knowing they have secure support. It builds confidence in both the patient and the caregiver, making transfers smoother and less anxiety-inducing. Furthermore, it allows for more dignified assistance, avoiding the need for direct physical contact that some patients may find intrusive. Ultimately, the gait belt is an invaluable tool for promoting safe, efficient, and respectful mobility assistance, creating a more secure environment for everyone involved in the care process.
When to Use a Gait Belt
A gait belt is essential for patients needing assistance with standing, walking, or transfers. This covers individuals experiencing weakness, impaired balance, or significant difficulty maintaining stability. It is crucial when moving patients between surfaces like a bed, chair, or commode for safe transition. The belt is vital for guiding ambulation, especially for those at increased fall risk or with a history of falls. Caregivers must apply it if a patient’s weight-bearing capacity is inconsistent, or their coordination is compromised. It provides a secure handhold, preventing injury from grasping clothing or fragile limbs. For dizziness, neurological deficits, or general unsteadiness, the gait belt offers vital control. Always use this as a standard safety measure for anyone needing more than minimal verbal cues for safe movement, promoting a truly secure assisted mobility experience.

Before Applying the Belt
Before applying the gait belt, thorough preparation is essential for safety. This phase ensures a safe environment and caregiver readiness. Pre-application steps enhance security during transfers and ambulation, minimizing risks.
Assessing Patient Needs and Mobility
Prior to any use of a gait belt, a comprehensive assessment of the patient’s physical and cognitive capabilities is paramount. This initial evaluation dictates the appropriateness of a gait belt and the level of assistance required. Observe the patient’s general strength, balance, and coordination. Can they bear weight on both legs? Are there any signs of weakness or dizziness? Assess their ability to follow simple commands and understand instructions, as cognitive function significantly impacts their cooperation and safety during transfers. Review the patient’s medical history for any contraindications, such as recent abdominal surgery, ostomy bags, feeding tubes, or respiratory conditions that might be exacerbated by pressure around the waist. Check for skin integrity around the proposed belt placement area to prevent injury. Inquire about their current pain levels, as discomfort can hinder participation and increase fall risk. Evaluate their typical mobility patterns and any recent changes in their functional status. This thorough pre-assessment ensures that the gait belt is used safely and effectively, tailoring the approach to each individual’s specific needs and minimizing potential risks during ambulation or transfers. It informs decisions regarding caregiver number, transfer method, and specific precautions.
Communicating with the Patient
Effective communication with the patient is a critical step before applying a gait belt. Always begin by explaining the purpose of the gait belt clearly and concisely, ensuring they understand why it is being used and how it will assist them. Use simple, non-technical language to describe the procedure, explaining each step you will take. For instance, inform them you will be placing a belt around their waist to help with stability and support during movement. Obtain their verbal consent before proceeding. Encourage the patient to ask any questions or voice any concerns they might have, addressing them patiently and reassuringly. Throughout the process, provide clear, actionable instructions, such as “On the count of three, we will stand up,” or “Please lean slightly forward.” This not only prepares them for what is to come but also fosters trust and cooperation, significantly reducing anxiety and increasing their participation. Maintain eye contact and speak in a calm, confident tone. Continually check for their understanding and comfort level, as their engagement is vital for a safe and successful transfer or ambulation. Reiterate that their safety is the top priority and that you will guide them carefully.

Applying the Gait Belt Correctly
Properly applying a gait belt is essential for safe patient handling. This section details the correct method for securing the belt, ensuring optimal support and stability for transfers and ambulation. Mastering these steps prevents injury.
Patient Positioning for Application
Before attempting to apply a gait belt, establishing the correct patient positioning is paramount for both safety and effectiveness. The ideal starting point is typically with the patient seated comfortably on a stable surface, such as the edge of a bed or a sturdy chair. Ensure their feet are flat on the floor, providing a secure base of support and preventing any unnecessary slippage or imbalance during the application process. Their back should be supported if possible, promoting an upright posture that makes it easier to wrap the belt around their waist.
Always ensure the patient’s clothing is not bunched or twisted around their midsection, as this could impede proper belt placement and cause discomfort. The area where the belt will be applied, usually around the natural waist or just below the rib cage, should be clear and easily accessible. Explain to the patient what you are about to do, fostering cooperation and reducing anxiety. This communication is vital for patient comfort and participation. Verify that there are no tubes, catheters, or other medical devices that could be interfered with by the belt. The caregiver should also ensure they are positioned to apply the belt without straining their own back, maintaining good body mechanics throughout. Proper initial positioning significantly streamlines the application process, setting the stage for a safe transfer or ambulation.
Placing the Belt Around the Waist
Once the patient is correctly positioned, the next crucial step involves carefully placing the gait belt around their waist. Begin by holding the belt with the buckle end in one hand and the free end in the other. Approach the patient from the front or side, depending on what allows for the safest and most efficient application. Gently guide the belt around the patient’s back, ensuring it lies flat and is not twisted. The ideal placement is typically around the patient’s natural waistline, or slightly below the rib cage and above the iliac crest, which are the prominent bones of the pelvis. This positioning provides the most secure grip for the caregiver without causing discomfort or restricting breathing.
Ensure the belt is placed over the patient’s clothing, never directly on bare skin, to prevent chafing or irritation; As you bring the ends of the belt back to the front, make sure there are no wrinkles or folds in the fabric, either of the belt itself or the patient’s clothing underneath. Confirm that any medical tubes, drains, or other devices are clear of the belt’s path to avoid dislodging them or causing injury. Maintain a firm but gentle hold on both ends of the belt as you prepare to fasten the buckle, ensuring the belt remains centered and evenly distributed around the patient’s circumference. This careful placement is foundational for the belt’s effectiveness and the patient’s comfort and safety during its use.

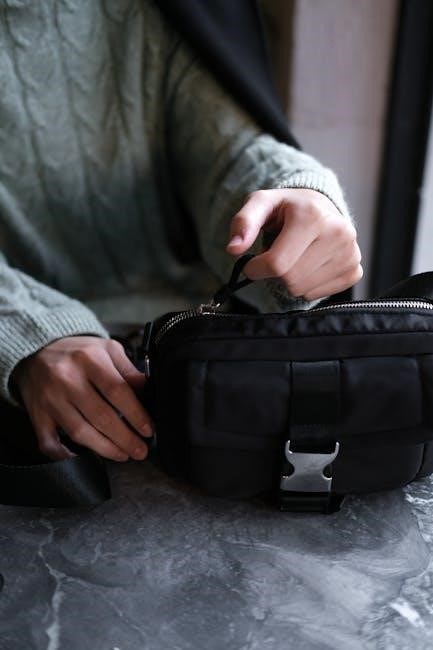
Fastening the Buckle Securely
Once the gait belt is correctly positioned around the patient’s waist, the next critical step involves securely fastening the buckle. Bring both belt ends to the front. Locate the buckle mechanism, typically involving threading the plain end through its designated slots. For most standard gait belts, this means feeding the strap through one slot, over a center bar or teeth, then back through a second. This threading creates a secure loop, effectively preventing slippage under tension. It is essential to thread the belt precisely as designed by the manufacturer for maximum security. Incorrect threading can cause the belt to loosen unexpectedly, compromising patient safety. After threading, pull the free end firmly to remove all slack, tightening it until perfectly snug around the patient’s waist. The buckle should ideally rest comfortably at the front or slightly to the side, avoiding direct pressure on bony prominences or sensitive areas. Ensure the belt lies flat without twists. Any excess strap material should be neatly tucked or looped through a designated keeper, preventing dangling hazards. A properly fastened buckle provides the essential foundation for safe patient transfers and optimal ambulation support.
Checking for a Proper and Snug Fit
After securely fastening the gait belt, verifying its proper and snug fit is paramount to ensuring patient safety and effective support during transfers or ambulation. The belt should be tight enough to prevent it from sliding up or down the patient’s torso, yet not so tight that it causes discomfort, restricts breathing, or creates pressure points. A widely accepted guideline is the “two-finger rule”: you should be able to comfortably slip two fingers, flat, between the gait belt and the patient’s body, but no more. If you can insert more fingers, the belt is too loose and requires further tightening. Conversely, if you cannot insert two fingers, it is too tight and must be slightly loosened. This ensures a secure grip without excessive compression. Visually inspect the belt to confirm it lies flat against the patient’s clothing, without any twists or bunching. Ask the patient if the belt feels comfortable and not restrictive. Pay close attention to their verbal and non-verbal cues. The buckle should remain centered or slightly to one side, avoiding any areas where it might cause discomfort when pressure is applied. A correctly fitted gait belt provides a firm, stable handhold for the caregiver, significantly reducing the risk of falls and injuries during mobility assistance.

Using the Gait Belt for Support
Once properly applied, the gait belt becomes an invaluable tool for safely assisting individuals with various mobility needs. It provides a secure grip for caregivers, enhancing stability and control during transfers, standing, walking, and seating. This section details its effective utilization for crucial support tasks.
Assisting with Standing Transfers
To assist with standing transfers, position yourself directly in front of the patient, using a wide, stable stance with bent knees. Instruct the patient to lean forward and place hands on armrests or your shoulders. Grasp the gait belt firmly with both hands, palms up, at the patient’s sides or back, ensuring a secure hold. On a clear verbal cue, instruct the patient to push off using their legs. As they begin to stand, gently guide them upwards using your leg strength, keeping your back straight. The belt provides crucial leverage for control; avoid lifting their entire weight with arms. Once standing, maintain a firm grip for continuous stability. Be prepared to adjust position or step to counteract unsteadiness. Communicate clearly, reassuring the patient and confirming readiness, ensuring a controlled, safe ascent to a standing posture.
Guiding and Supporting During Ambulation
When guiding and supporting a patient during ambulation, position yourself slightly behind and to one side of the patient, typically their weaker side if applicable. Maintain a wide base of support with your feet, ready to move with the patient. Grasp the gait belt firmly from underneath with one hand, or both hands if more support is needed, keeping your palms facing upwards. This grip allows for immediate control and prevents the patient from falling forward or backward. Walk in sync with the patient, matching their pace and stride length. Use the gait belt to provide gentle guidance, not to pull or hoist the patient. Be attentive to any signs of unsteadiness, dizziness, or fatigue. If the patient begins to lose balance, use the belt to stabilize them by gently pulling them closer to your body or guiding them back into a stable position. Keep your knees slightly bent and engage your core muscles to protect your back. Continuously communicate with the patient, offering encouragement and checking on their comfort level. This proactive approach ensures safe and controlled movement, minimizing the risk of falls during the walking process.


Safe Seating Assistance with a Gait Belt

To safely assist a patient with seating using a gait belt, first ensure the chair or seating surface is stable, locked if it has wheels, and positioned directly behind the patient. Have the patient back up until the backs of their legs touch the chair. Stand in front of the patient, maintaining a wide base of support. Grasp the gait belt firmly on both sides, with your hands placed on their sides or slightly towards their back. Instruct the patient to reach back for the armrests of the chair, if available, or to place their hands on your shoulders for balance, but not to pull on your neck.
As the patient begins to bend their knees and lower themselves, gently guide and control their descent using the gait belt. Do not allow them to drop suddenly. Keep your back straight and bend at your knees and hips, using your leg muscles to manage the patient’s weight. Guide them slowly and smoothly into the seated position. Ensure they are fully seated and stable before releasing your grip on the belt. This controlled descent prevents falls and injuries, providing a secure and dignified seating experience for the patient while protecting the caregiver from strain.
Key Safety Precautions and Considerations
When using a gait belt, several critical safety precautions must always be observed to prevent injury to both the patient and caregiver. Firstly, always perform a thorough patient assessment to confirm their ability to bear weight, their cognitive understanding of instructions, and any medical conditions or recent surgeries (e.g., abdominal, ostomy, colostomy) that contraindicate gait belt use or require alternative placement. Never apply the belt over surgical incisions, feeding tubes, or areas of compromised skin integrity. Ensure the environment is clear of obstacles, well-lit, and that footwear provides adequate traction.
Before any transfer or ambulation, check the gait belt itself for signs of wear, fraying, or a malfunctioning buckle. The fit must be snug, allowing only two fingers to slide underneath comfortably, but never restricting breathing or circulation. Maintain a wide base of support and use proper body mechanics, bending at the knees and hips, not the waist, to protect your back. Always communicate clearly with the patient throughout the process, explaining each step. Should a patient begin to fall, guide them gently to the nearest stable surface or to the floor, protecting their head; Never attempt to lift a falling patient alone if they are too heavy; instead, control the fall as safely as possible. Regularly review facility policies and procedures for gait belt usage.