
butterball turkey fryer instruction manual
Butterball Turkey Fryer Instruction Manual: A Comprehensive Guide
This manual provides detailed instructions for safely operating your Butterball electric turkey fryer, covering setup, frying, and cleanup procedures for delicious results.
Butterball turkey fryers offer a convenient and efficient method for cooking a delicious, juicy turkey. These electric fryers, like the Masterbuilt XL model (23011114 & ETF3A), provide a safer alternative to traditional propane fryers. This comprehensive guide details operation, ensuring a perfectly fried turkey every time.

Masterbuilt provides online resources, including operation manuals in both English and Spanish, and instructional videos demonstrating how to fry a turkey. Proper understanding of these instructions is crucial for a successful and safe frying experience.
Safety Precautions
Prioritizing safety is paramount when operating a Butterball turkey fryer. Always adhere to all provided warnings and instructions. The heating element is powerful and only activates when securely attached, a crucial safety feature. Never operate the fryer indoors or near flammable materials.
Be extremely cautious when handling hot oil. Ensure the turkey is completely thawed and dry before frying to prevent dangerous splattering. Follow electrical safety guidelines and proper oil disposal procedures to avoid hazards.
General Safety Guidelines
Always operate the fryer on a flat, stable, non-combustible surface outdoors, away from structures and flammable items. Never leave the fryer unattended during operation. Keep children and pets a safe distance away. Ensure a Class ABC fire extinguisher is readily accessible.
Do not overfill the fryer with oil, and carefully monitor the oil temperature throughout the frying process. Use appropriate protective gear, including oven mitts and eye protection. Improper use can lead to serious injury.
Electrical Safety
Ensure the fryer is plugged into a grounded outlet and avoid using extension cords if possible. If an extension cord is necessary, it must be heavy-duty and rated for outdoor use. Never operate the fryer with a damaged cord or plug.
Do not expose the electrical components to water or other liquids. The heating element only activates when securely attached; never attempt to bypass this safety feature. Disconnect the fryer from the power source before cleaning or storing.
Oil Safety
Hot oil poses a significant burn risk; exercise extreme caution during operation. Never leave the fryer unattended while heating or frying. Ensure the turkey is completely thawed to prevent dangerous boil-overs.
Do not overfill the fryer with oil, and always use a sufficient amount to fully submerge the turkey. Dispose of used oil responsibly, following local regulations. Never mix water with hot oil, as this can cause a violent reaction.
Understanding Your Butterball Fryer Model
Your Butterball fryer, potentially model 23011114 or ETF3A, is designed for indoor turkey frying. Familiarize yourself with all components before use. Key features include a heating element with a safety mechanism – it only activates when properly attached.
The XL model accommodates turkeys up to 22 lbs (9.98 kgs). Refer to the operation manual for detailed component identification and specific instructions related to your particular model for optimal performance.

Model Numbers and Features (e.g., 23011114, ETF3A)
Butterball offers various fryer models, including the popular 23011114 and ETF3A. The XL Indoor Electric Turkey Fryer (23011114) is a common choice. These models are designed for indoor use, providing a safe alternative to outdoor propane fryers.
Key features include precise temperature control, a robust heating element, and a safety interlock. The XL model can handle turkeys up to 22lbs. Always consult your specific model’s manual for detailed specifications and features.
Component Identification
Your Butterball fryer includes several key components: the fryer pot, heating element, control panel, lid, and a turkey rack; The heating element securely attaches to a mounting bracket for safe operation. The control panel allows precise temperature adjustments.
Familiarize yourself with each part before use. The pot holds the frying oil, while the rack supports the turkey during cooking. Ensure all components are properly assembled before proceeding, referencing the diagrams in your manual for correct placement.
Preparing for Turkey Frying
Proper turkey preparation is crucial for safe and successful frying. Begin by ensuring your turkey weighs between 14-22 lbs (6.35-9.98 kgs); exceeding this limit is unsafe. Thoroughly thaw the turkey, maintaining a temperature of 35-40°F (1.6-4.4°C).
Remove giblets and neck, then rinse the turkey inside and out with cold water. Pat it completely dry with paper towels – excess moisture can cause dangerous splattering during frying. A dry turkey ensures crispy skin and safe operation.
Turkey Size and Weight Limits (14-22 lbs / 6.35-9.98 kgs)
Adhering to weight limits is paramount for safe operation. This Butterball fryer is designed for turkeys weighing between 14 and 22 pounds (6.35 to 9.98 kilograms). A recommended size is an 18-20 lb (8.16-9.07 kgs) turkey, but do not exceed the 22 lb maximum.
Using a turkey outside this range poses significant risks, including oil overflow and potential injury. Always verify the turkey’s weight before beginning the frying process to ensure a safe and enjoyable experience.
Thawing the Turkey (35-40°F / 1.6-4.4°C)
Complete thawing is crucial before frying; never attempt to fry a frozen turkey. Maintain a thawing temperature between 35-40°F (1.6-4.4°C) throughout the process. Allow ample time – several days may be needed depending on the turkey’s size.
Ensure the turkey is fully thawed, with no ice crystals remaining inside the cavity, to prevent dangerous oil splatter and ensure even cooking. Proper thawing guarantees a safe and delicious fried turkey.
Turkey Preparation (Rinsing & Drying)
After thawing, thoroughly rinse the turkey, both inside and outside, with cool water. This removes any residual ice crystals or impurities. Pat the turkey completely dry with paper towels – this is extremely important to minimize oil splatter during frying.
Ensure all cavities are dry, as even small amounts of water can cause a dangerous reaction when it meets hot oil. A dry turkey promotes safer frying and a crispier, more flavorful result.
Frying Oil Selection and Quantity
Select a high smoke-point oil suitable for deep frying, such as peanut, canola, or vegetable oil. Avoid olive oil, as it has a lower smoke point and can affect the turkey’s flavor. Determining the correct oil volume is crucial for safety and even cooking.
Perform a “dry run” by placing the turkey in the fryer pot and covering it with water. Remove the turkey and mark the water level – this indicates the required oil quantity.
Recommended Oil Types
For optimal results and safety, choose oils with high smoke points when using your Butterball fryer. Peanut oil is highly recommended due to its flavor neutrality and high temperature tolerance. Canola and vegetable oils are also suitable alternatives, offering good performance and affordability.
Avoid using olive oil or other oils with low smoke points, as they can break down, impart undesirable flavors, and potentially create a fire hazard.
Determining Oil Volume
Accurately calculating the required oil volume is crucial for safe frying. Place the turkey in the empty fryer pot and fill with water until the bird is fully submerged, leaving a few inches of space below the fill line.
Remove the turkey and carefully mark the water level. Dry the pot thoroughly and this mark indicates the amount of oil needed. Never overfill – exceeding the maximum oil level poses a significant safety risk.
Fryer Setup and Operation
Before operation, ensure the fryer is on a flat, stable, non-combustible surface outdoors. Carefully assemble the fryer, ensuring all components are securely connected. Attach the heating element, verifying it clicks firmly into the mounting bracket – it only heats when properly attached, a key safety feature.
Plug in the fryer and set the desired frying temperature, typically around 350°F (177°C). Allow the oil to preheat completely before proceeding; this may take considerable time.
Assembling the Fryer
Begin by carefully placing the fryer pot onto the base, ensuring it sits securely. Next, insert the support frame into the pot, providing stability for the turkey. Double-check all connections are firm before adding oil. The heating element assembly requires careful attention; align it with the designated mounting bracket.
Ensure the element is properly seated and locked into place – it won’t operate unless correctly attached. Verify all parts are clean and undamaged before proceeding with oil filling.
Attaching the Heating Element (Safety Feature)
The Butterball fryer incorporates a crucial safety feature: the heating element only activates when securely attached to its mounting bracket. Align the element’s connector with the bracket, ensuring a firm and audible click confirms proper engagement. Do not attempt to operate the fryer if the element isn’t fully locked in place.
This prevents accidental operation and potential hazards. Regularly inspect the connection before each use. A properly attached element is vital for safe and efficient turkey frying.

Setting the Temperature
To begin frying, set the temperature control dial to 350°F (177°C). This is the recommended temperature for consistently cooking a thoroughly delicious and safely prepared turkey. Do not reduce the temperature during the cooking process, as this can lead to uneven cooking and potential food safety concerns.
Monitor the temperature gauge closely throughout the frying process, adjusting as needed to maintain the optimal 350°F. Consistent temperature control is key to a perfectly fried turkey.
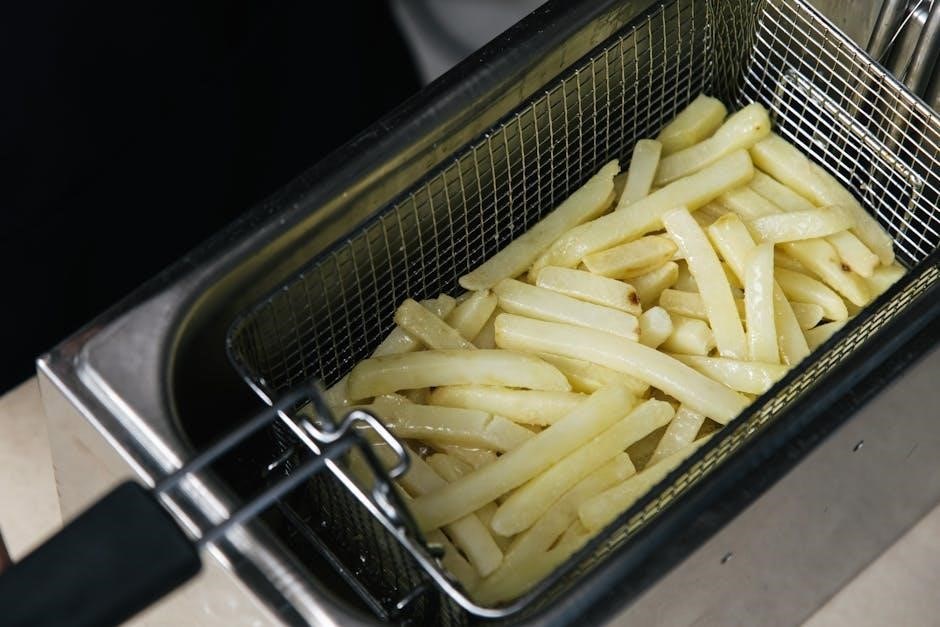
The Turkey Frying Process
Carefully and slowly lower the thoroughly dried turkey into the preheated oil, using the included hook or a sturdy pot holder. Avoid splashing, as hot oil can cause severe burns. Once submerged, maintain a consistent oil temperature of 350°F (177°C).
Frying time is approximately 3-4 minutes per pound (4.5 minutes per kilogram). Monitor the internal temperature with a meat thermometer, ensuring it reaches 165°F (74°C) in the thickest part of the thigh.
Lowering the Turkey into the Oil
Attach the turkey securely to the lifting hook, ensuring a firm grip. Slowly and cautiously lower the turkey into the hot oil, maintaining a controlled descent to prevent splashing. Be extremely careful, as the oil will react violently to any moisture.
Release the turkey gently once fully submerged. Never drop the turkey into the oil, and avoid overcrowding the fryer. Ensure the heating element remains fully immersed during the entire frying process.
Frying Time Calculation
Calculate frying time at a rate of 3-4 minutes per pound (450-600 grams) for a thoroughly cooked turkey. A 14-18 lb (6.35-8.16 kgs) turkey typically requires 30-48 minutes, while a larger 18-20 lb (8.16-9.07 kgs) turkey may take up to 50-60 minutes.
Always use a meat thermometer to verify an internal temperature of 165°F (74°C) in the thickest part of the thigh. Do not rely solely on time; temperature is crucial for food safety.
Monitoring Oil Temperature
Maintain a consistent oil temperature of 350°F (177°C) throughout the frying process. Use the built-in thermometer or a separate deep-fry thermometer for accurate readings. Fluctuations can affect cooking time and result in unevenly cooked turkey.
Monitor the temperature closely, especially when lowering the turkey, as it will cause a temporary drop. Adjust the fryer’s settings to quickly restore the optimal temperature for consistent results and safety.
Post-Frying Procedures
Carefully remove the turkey from the hot oil using the lifting hook, allowing excess oil to drain back into the pot. Place the turkey on a heat-resistant surface to cool for at least 20-30 minutes before carving. Avoid direct contact with the hot oil.
Allow the oil to cool completely before attempting disposal; never pour hot oil down the drain. Proper oil disposal is crucial for environmental safety. Consult local regulations for appropriate methods.
Removing the Turkey from the Oil
Utilize the provided lifting hook to carefully raise the fully cooked turkey from the hot oil. Ensure a secure grip to prevent accidental drops, as the turkey will be extremely hot. Slowly and steadily lift, allowing excess oil to drain back into the fryer pot.
Position the turkey over a heat-resistant surface, like a large roasting pan, to catch any remaining drips. Exercise extreme caution during this process to avoid burns. Never attempt to remove the turkey without the lifting hook.
Cooling and Carving
Allow the fried turkey to cool for at least 20-30 minutes before attempting to carve. This cooling period is crucial for safe handling and easier carving. Use heat-resistant gloves when handling the turkey during this time.
Carve the turkey as you normally would, using a sharp carving knife and fork. The meat should be incredibly moist and flavorful due to the frying process. Serve immediately and enjoy your perfectly fried turkey!
Oil Disposal
Never pour used frying oil down the drain; it can cause significant plumbing problems. Allow the oil to cool completely before handling. Carefully pour the cooled oil into a sealed, leak-proof container, such as the original oil container or a designated recycling jug.
Contact your local waste management services for proper disposal guidelines. Many communities offer oil recycling programs. Do not mix oil with other waste materials.
Cleaning and Maintenance
Always unplug the fryer and allow it to cool completely before cleaning. Carefully remove the oil and dispose of it properly (see Oil Disposal section). Wash the fryer pot with warm, soapy water, avoiding abrasive cleaners. The heating element should be wiped clean with a damp cloth – never immerse it in water.
Ensure all components are dry before storing. Store the fryer in a cool, dry place, protected from the elements.
Cleaning the Fryer Pot
After each use, carefully remove all remaining oil from the fryer pot. Wash the pot with warm, soapy water, using a non-abrasive sponge or cloth to avoid scratching the surface. Avoid harsh chemical cleaners that could damage the pot’s finish or leave residue. Rinse thoroughly to remove all soap traces.
Dry the pot completely before storing or reassembling the fryer; Inspect for any damage before future use.
Cleaning the Heating Element
Before cleaning, ensure the heating element is completely cool and unplugged from the power source. Wipe the element with a damp cloth to remove any oil residue or splatter. Do not submerge the heating element in water or any other liquid, as this can cause electrical hazards.
Avoid using abrasive cleaners that could damage the element’s coating. Inspect the element for any signs of damage before future use, and replace if necessary.
Storage Instructions
After thorough cleaning and drying, store the fryer in a cool, dry location, away from direct sunlight and extreme temperatures. Ensure all components are completely dry before storage to prevent rust or corrosion. Keep the original packaging for safe and convenient storage when not in use.
Store the heating element separately to avoid damage. Regularly inspect the unit during storage for any signs of deterioration, and address them promptly.
Troubleshooting Common Issues
If the fryer isn’t heating, verify the heating element is securely attached to the mounting bracket – it only heats when properly connected. Check the power cord and outlet for functionality. For oil overheating, immediately turn off the fryer and allow it to cool completely.
Ensure the correct oil volume is used and the temperature is set appropriately. Never leave a hot fryer unattended and always follow safety guidelines.
Fryer Not Heating
If your Butterball fryer isn’t heating, the first step is to ensure the heating element is firmly and correctly attached to its mounting bracket; it’s a key safety feature preventing operation without secure placement. Verify the power cord is fully plugged into a working electrical outlet.
Test the outlet with another appliance. Inspect the cord for any damage. If issues persist, consult the warranty information or contact Masterbuilt support for assistance.

Oil Overheating
If the oil overheats, immediately turn off the fryer and disconnect it from the power source. Allow the oil to cool completely before attempting any handling or disposal. Overheating can be dangerous and may indicate a thermostat malfunction.
Do not exceed the recommended frying temperature. Ensure the turkey is fully thawed and dry before lowering it into the oil, as excess water can cause splattering and rapid temperature increases. Contact support if overheating continues.
Frequently Asked Questions (FAQ)
Can I fry a frozen turkey? Absolutely not! A frozen turkey will cause a violent reaction with the hot oil, creating a dangerous situation. Ensure the turkey is completely thawed to 35-40°F (1.6-4.4°C) before frying.
What is the ideal oil temperature? Maintain a consistent temperature of 350°F (177°C) throughout the frying process. Monitor the temperature closely using the built-in thermometer for optimal results and safety.
Can I fry a frozen turkey?

Never attempt to fry a frozen or partially frozen turkey! Introducing a frozen turkey to hot oil will result in a dangerous and potentially explosive reaction. The rapid expansion of ice into steam causes violent oil splatter, posing a severe burn risk and fire hazard. Thorough thawing is absolutely critical for safety. Ensure the turkey reaches a consistent internal temperature of 35-40°F (1.6-4.4°C) before proceeding with the frying process.
What is the ideal oil temperature?
Maintaining the correct oil temperature is crucial for safe and evenly cooked turkey. The ideal frying temperature is consistently 350°F (177°C). Do not reduce the temperature during the cooking process, as this can lead to a greasy final product. Monitor the temperature closely using the fryer’s built-in thermometer. Allow the oil to return to 350°F after lowering the turkey, and adjust the thermostat as needed to maintain this optimal range throughout frying.
Warranty Information
Masterbuilt Products, LLC warrants this Butterball turkey fryer to be free from defects in material and workmanship for one year from the date of purchase. This warranty covers components, not including normal wear and tear. Damage caused by misuse, abuse, or improper maintenance is not covered. To obtain warranty service, contact Masterbuilt customer support with proof of purchase. The warranty is non-transferable and applies only to the original purchaser.
Contact Information for Support
For assistance with your Butterball turkey fryer, contact Masterbuilt Products, LLC customer support. You can reach them via phone at 1-800-489-3334. Alternatively, visit the Masterbuilt website at www.masterbuilt.com for FAQs, troubleshooting guides, and online support resources. Email support is also available through the website’s contact form. Ensure you have your model number (e.g., 23011114, ETF3A) ready when contacting support for efficient assistance.
Additional Resources (Masterbuilt Website)
Enhance your frying experience with Masterbuilt’s online resources! Visit www.masterbuilt.com to access “Getting to Know Your XL Fryer” videos, offering a visual guide to setup and operation. Download the complete operation manual in both English and Spanish for detailed instructions and safety guidelines. Explore FAQs and troubleshooting tips to resolve common issues quickly. Masterbuilt provides comprehensive support to ensure a successful and safe turkey frying experience;
Getting to Know Your XL Fryer (Online Resources)
Masterbuilt offers a helpful video resource for XL Fryer owners! Access “Getting to Know Your XL Butterball Indoor Electric Turkey Fryer” on their website (www.masterbuilt.com). This visual guide demonstrates proper assembly, component identification, and safe operating procedures. The video simplifies the process, ensuring you understand each step before frying. It’s a valuable tool for first-time users and a quick refresher for experienced fryers, maximizing your confidence and results.
Operation Manual Download (English & Spanish)
For comprehensive guidance, download the official Butterball/Masterbuilt operation manual! Available in both English and Spanish, this document details all aspects of fryer operation and safety. It includes crucial information on preparation, frying times, cleaning, and troubleshooting. Access the PDF directly from the Masterbuilt website for convenient offline viewing. Ensure you thoroughly review the manual before your first use to guarantee a safe and successful turkey frying experience.